Amazing 1-Hour Italian Bread: Crusty Joy – Forkful Heaven
Hey friends, there’s nothing quite like walking into your kitchen and catching that warm, inviting scent of freshly baked Italian bread filling the air. It feels like a cozy hug, doesn’t it? For the longest time, I thought those bakery-quality loaves were reserved for the pros only. But after quite a few tries (and some flour on the floor!), I nailed a recipe that delivers that perfect golden, crunchy crust with a soft, chewy center. And guess what? It’s easy enough for anyone to make at home! If baking bread feels like a big mountain to climb, this friendly, step-by-step guide will help you conquer it with confidence. Baking this loaf has become a joyful weekly ritual that I genuinely look forward to sharing with my family.
If you’ve ever dreamed of that bakery-style Italian bread but felt a little overwhelmed, you’re in the exact right place. We’re about to dive into a method that’s fuss-free, reliable, and yields a loaf with a beautiful crackly crust and tender crumb — all from simple pantry ingredients and a reasonable bit of hands-on time.
I’ll walk you through every step clearly, explaining the why behind the process—like the 8 to 10 minutes of kneading that builds strength in the dough, the two gentle rises that keep it light and airy, and the secret steam trick that gives the bread that incredible crust. Along the way, you’ll learn about shaping, scoring, baking at 400°F for that perfect 30 to 35 minutes, plus timing and cooling tips that really make a difference (that waiting period before slicing? Totally worth it!). I’ll also share easy ways to tweak the dough — maybe add olives, cheese, or turn it into roll shapes — and troubleshoot common bread bumps. Whether this is your first loaf or a new go-to, you’ll finish with a trusty homemade Italian bread that brings everyone to the table.
By the end, I promise you’ll be hooked on baking this beautiful bread again and again right from your own oven.
I crafted this recipe so absolutely anyone — even if you’re just starting out — can enjoy pulling a gorgeous, bakery-style Italian bread from your oven. Forget complicated artisan techniques that drain your time and patience. This is all about Easy Crusty Bread Baking that fits into busy home life, no stress required. Here on Forkful Heaven, I’m all about recipes that are simple, dependable, and full of flavor, and this loaf hits every mark with its classic, comforting texture.
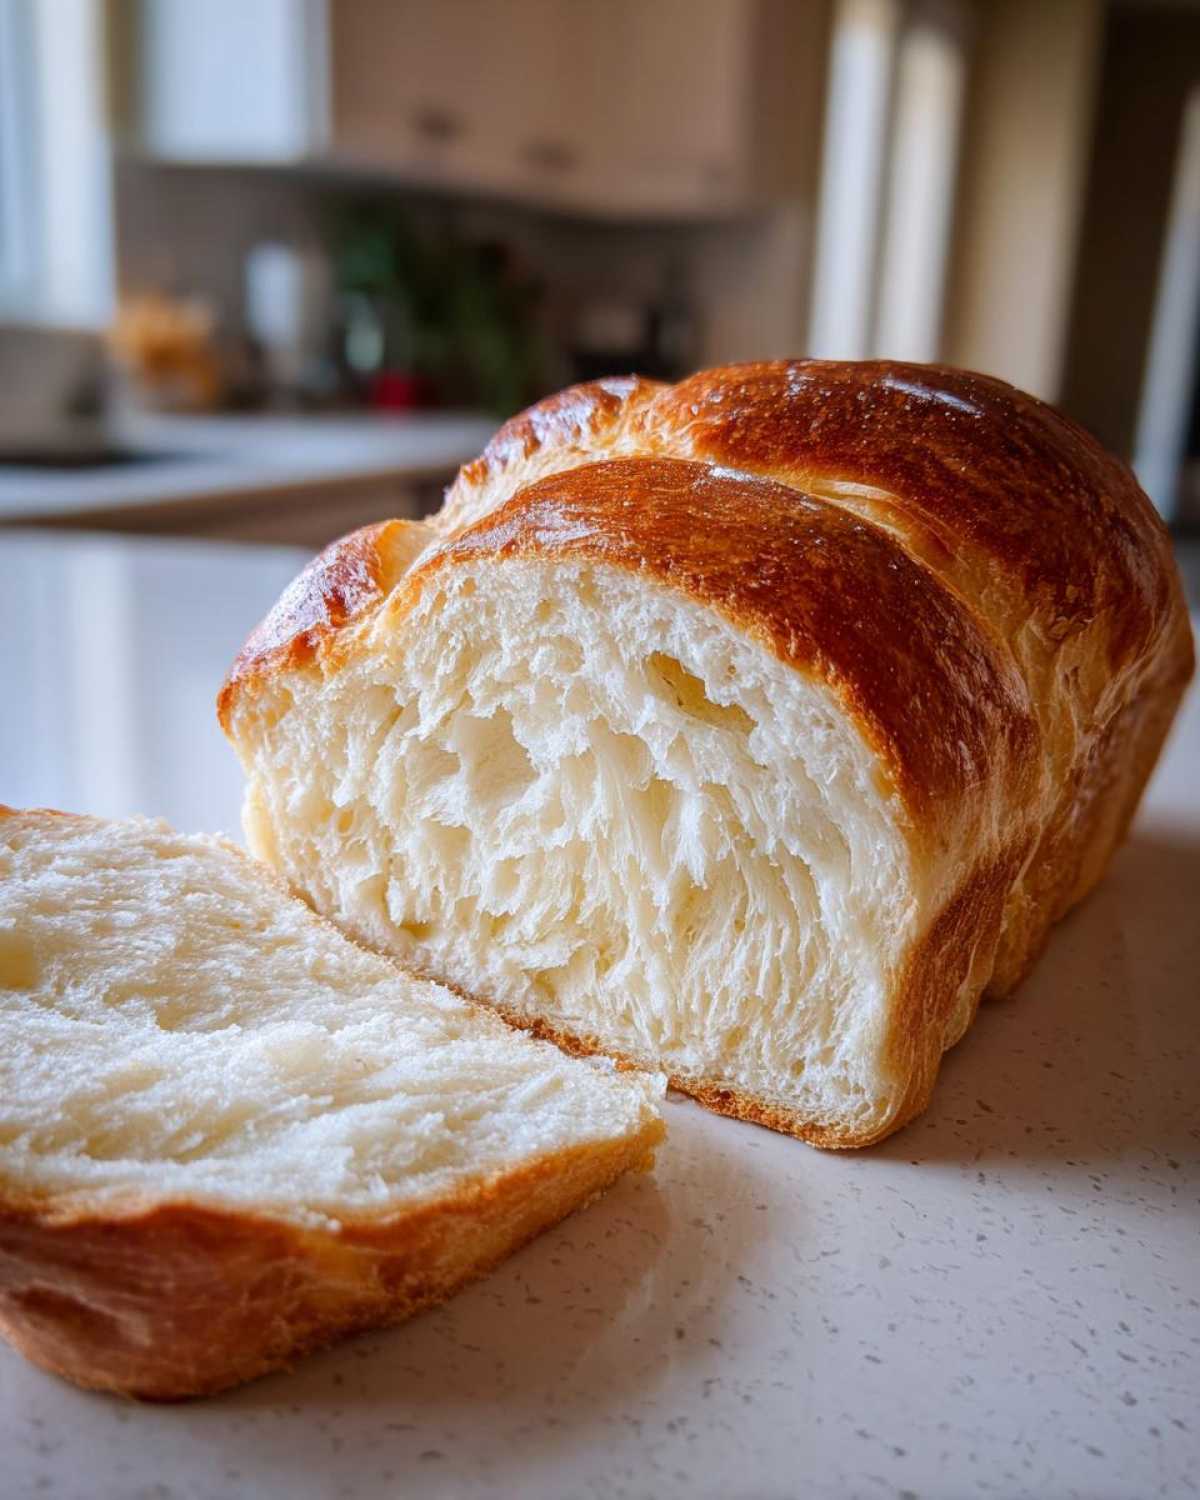
When you tap the crust, it cracks delightfully. Inside, the crumb is light, airy, and tender. This Soft Inside Crusty Outside Bread is ideal for soaking up pasta sauce or building sandwiches with fillings that don’t spill everywhere. And honestly? The pride of knowing you baked it yourself makes every bite taste even better!
Let me give you a handful of reasons why this bread quickly became my weekly baking favorite—you’ll want to start right now:
- The irresistible home-baked aroma: That warm, yeasty fragrance fills your entire kitchen and instantly makes the space feel welcoming and cozy. It’s a smell that never gets old.
- Everyday pantry staples: No need for specialty flours or rare ingredients—just all-purpose flour, water, yeast, salt, a pinch of sugar, and olive oil. Simple, familiar, and always on hand.
- Consistent texture, guaranteed: Follow my kneading and steam baking tips, and you’ll get a perfect crisp crust with a chewy, soft inside every single time.
- Perfect for beginners yet impressive for everyone: The steps are straightforward. Those 8 to 10 minutes of kneading and two rises really pay off, even on your first try.
- Versatile and welcome on any table: Great for dipping in olive oil, soaking up sauce, piling with sandwiches, or serving alongside soups and salads — it pairs beautifully with a ton of meals.
- Minimal equipment, maximum wow factor: You don’t need a fancy mixer or oven setup. Just a hot shallow pan for steam or a baking stone will do the trick, and those are easy additions to your kitchen collection.
- Easily customized: Want to toss in olives, sprinkle cheese, herbs, or shape dough as rolls or pan bread? This recipe invites your creativity.
- Great for storing and reviving: Wrap it well, and your loaf stays fresh for a couple days. Plus, warming it up in the oven brings back that lovely crust and aroma—no crumb wasted here.
In short, this recipe hits that mouthwatering balance of crunchy crust and pillowy crumb with simple ingredients and clear steps. It’s forgiving, flexible, and most importantly—delicious. Give it a go and enjoy every slice!
Why This Loaf Works So Well
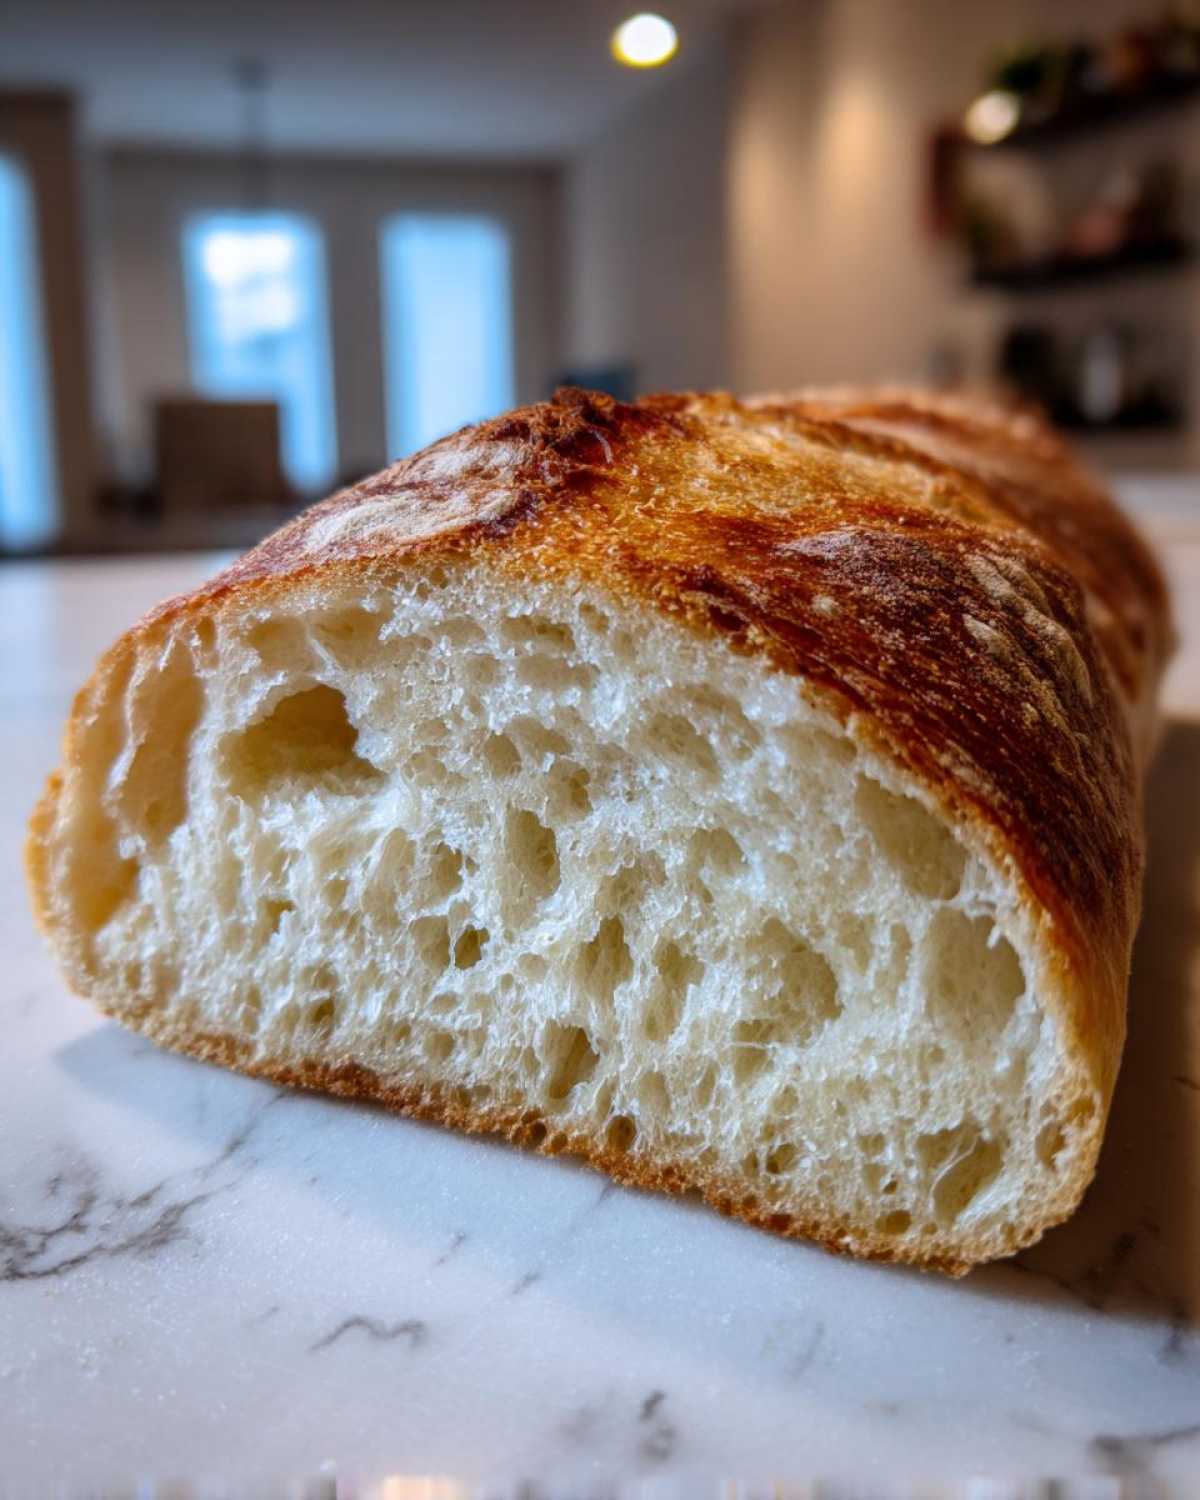
If you’re chasing that bakery-style bread without the fuss, this recipe is made just for you. It delivers a beautiful deep golden, crackly crust and a soft, chewy interior using easy-to-find pantry ingredients and straightforward instructions you can trust. The secret is focusing on a few smart moves—kneading to develop gluten, gentle double rises for lightness, and that all-important steam for a crispy crust—so you get repeatable, delicious loaves every time.
- Bakery results at home: The magic combo of proper kneading, a hot 400°F oven, and steam creates bread that looks and tastes like you bought it fresh from the bakery.
- A glorious aroma that fills your home: That warm, yeasty smell invites the whole family to the kitchen and lifts your mood instantly. Baking bread is self-care for your senses!
- Simple, everyday ingredients: No need for fancy stuff—basic flour, water, yeast, salt, a pinch of sugar, and olive oil come together beautifully.
- Beginner-friendly yet impressive: The instructions are clear and forgiving; even your first loaf can have that gorgeous crust and tender bloom if you stick with the process.
- Minimal kitchen tools, big impact: No stand mixer needed! Just a bowl, baking sheet, and a shallow pan or baking stone to create that stunning oven spring and crust.
- Versatile for your meals: Whether it’s for dipping into olive oil, mopping up pasta sauce (try it with this bright broccoli chickpea pasta with garlic olive oil), hearty sandwiches, or a side to soup, this bread pairs like a dream.
- Customizable without risk: The recipe happily accepts mix-ins like olives, cheese, herbs, or shape changes like rolls and pan breads while keeping that classic texture.
- Easy to store and refresh: Store loosely wrapped for a day or two, and revive a slightly stale loaf by warming it in foil or misted and crisped in a hot oven—simple steps that bring it right back.
Bottom line? You’ll adore this loaf because it nails what really matters—crackly crust, tender crumb, comforting aroma, and a straightforward method you can fit into your busy life. Time to bake and impress with your very own bakery-worthy Italian bread!
Exact Ingredients and Measurements
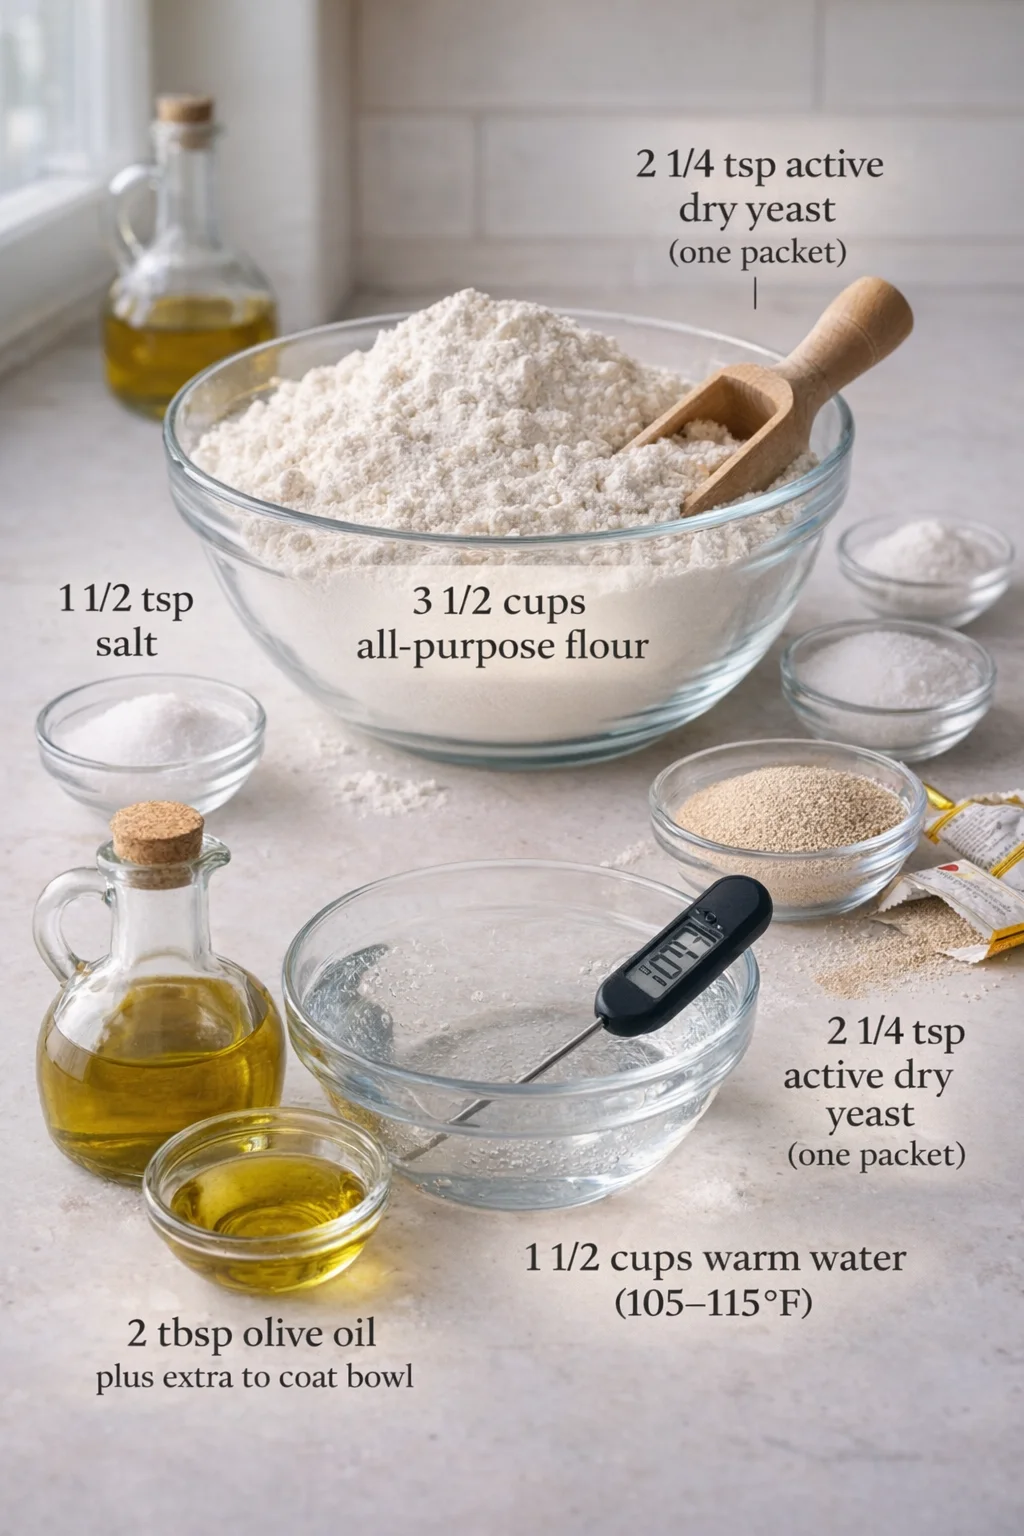
- 3 1/2 cups all-purpose flour
- 1 1/2 teaspoons salt
- 1 teaspoon granulated sugar
- 2 1/4 teaspoons active dry yeast (that’s one standard packet!)
- 1 1/2 cups warm water (aim for 105–115°F—it really matters!)
- 2 tablespoons olive oil, plus extra to coat your bowl
Make, Shape, and Bake Your Loaf
- Whisk together 3 1/2 cups all-purpose flour, 1 1/2 teaspoons salt, 1 teaspoon sugar, and 2 1/4 teaspoons active dry yeast in a large bowl.
- Warm 1 1/2 cups water to 105–115°F (should feel comfortably warm).
- Pour the warm water and 2 tablespoons olive oil into the dry ingredients and stir with a wooden spoon until a rough, sticky dough forms.
-
Lightly flour your work surface and knead the dough 8–10 minutes by pushing with the heels of your hands, folding, turning, and repeating until smooth, stretchy, and slightly springy.
- Lightly grease a clean bowl with olive oil, place the dough inside, cover snugly with a towel or plastic wrap, and let rise in a warm spot 1–1 1/2 hours until doubled.
- Gently press the air out of the dough, shape it into a loose oval or round, and place it on a parchment-lined baking sheet.
- Cover the shaped loaf loosely and let it rise again 30–45 minutes until puffed and airy.
-
Preheat the oven to 400°F with a shallow pan on the bottom rack and, if available, a baking stone or cast-iron skillet on an upper rack.
- Brush the top of the loaf lightly with water and score a few shallow slashes across the top with a sharp knife or razor blade.
- Just before baking, pour about 1 cup hot water into the preheated shallow pan on the bottom rack, quickly close the oven to trap steam, and slide the loaf into the oven.
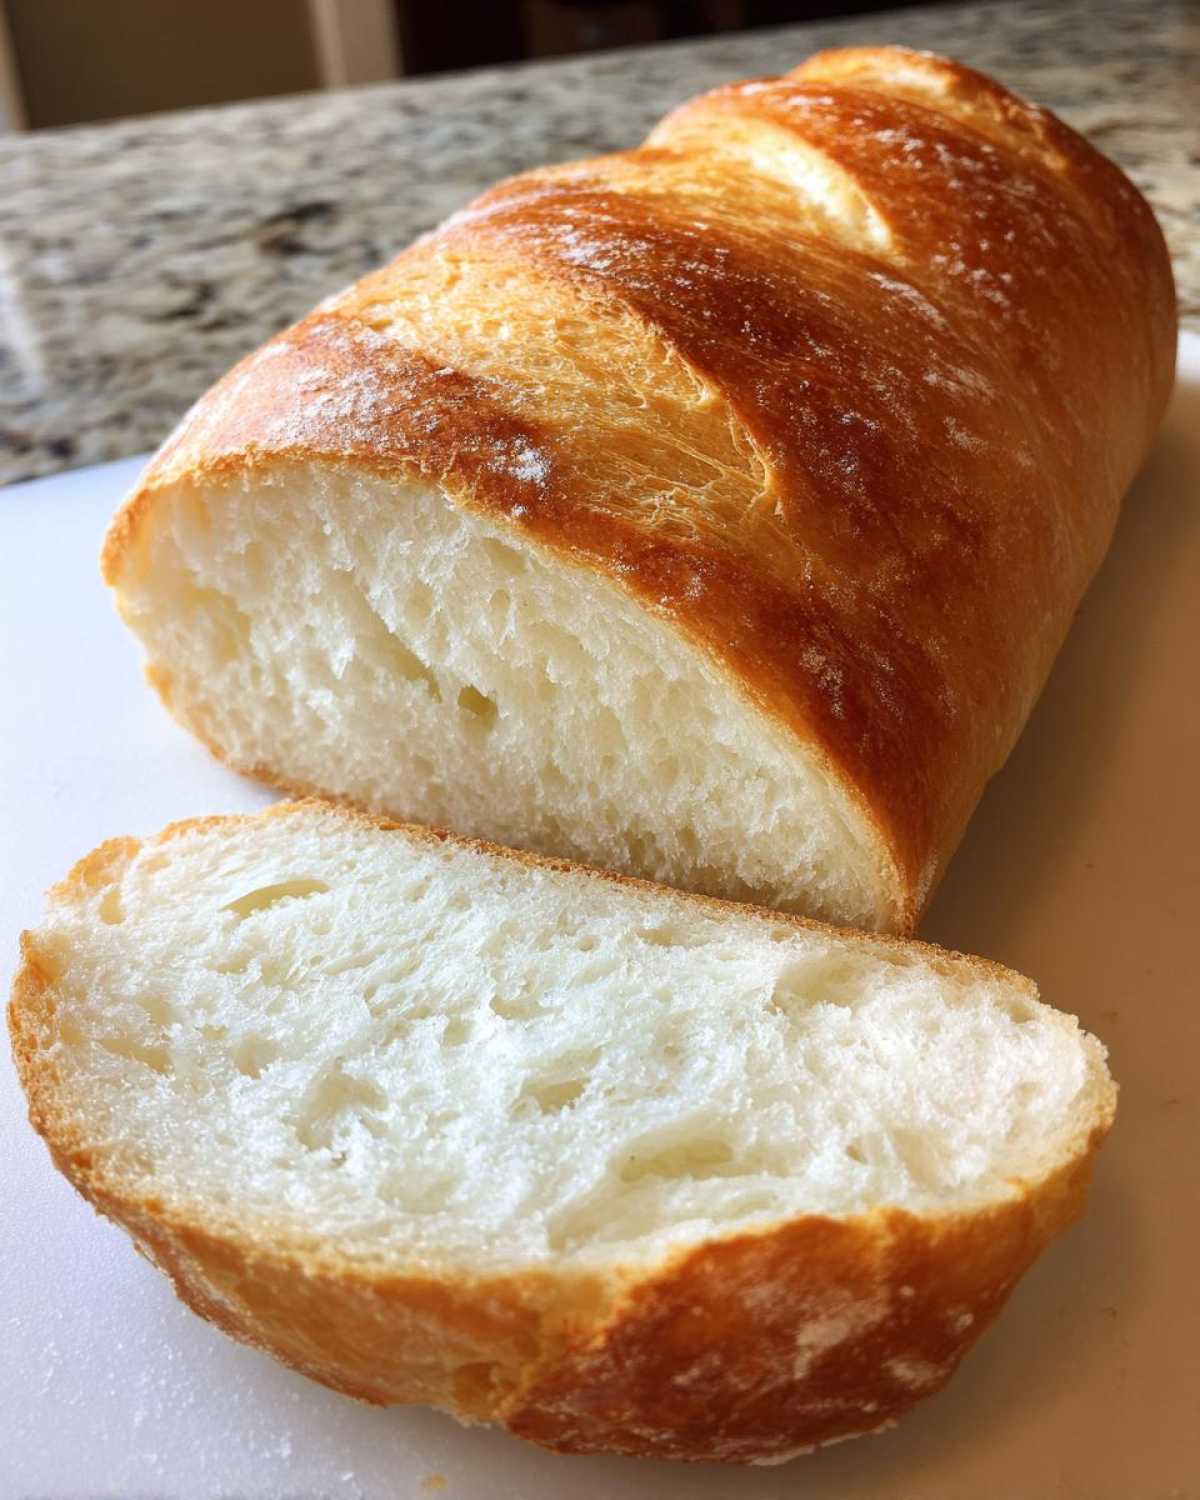
- Bake 30–35 minutes until the crust is deep golden brown and the loaf sounds hollow when tapped.
-
Remove the bread from the oven and cool completely at least 45 minutes before slicing.

Secrets for a Crackly, Golden Crust
This recipe shines on its own, but a handful of pro tips will turn your bread from nice to “Wow — did you really make this?!”. The biggest game-changer? Steam! That hot water in the oven pan creates a humid atmosphere that keeps the crust soft at first so it can expand fully before hardening into that incredible crackly texture we all love. Don’t skip this step — without steam, your crust stays dull and soft rather than crisp and crunchy.
If you have a baking stone or heavy cast-iron skillet, pop it in the oven as it preheats. Baking your bread on a blazing hot surface creates a fantastic oven spring — that last dramatic rise when the dough hits the heat — making your loaf light and airy inside. Seriously, this is an artisan trick that anyone can pull off.
Also, resist the urge to slice right away. I get it — that smell is seriously tempting! But cutting bread while it’s hot traps steam inside, which makes the crumb dense and gummy. I usually wait at least 45 minutes before slicing for the best texture and crumb.
That first slice releasing a puff of steam is pure kitchen magic. Once cooled, this bread pairs beautifully with bold flavors — try it next to Antipasto Skewers — or simply alongside soup or salad.
One of my all-time favorite ways to enjoy this bread — especially next to a plate of spaghetti aglio e olio — is to cut thick diagonal slices, drizzle them with good olive oil, and sprinkle flaky sea salt on top. It’s hands down one of the best Dipping Bread Recipes out there — and if you love garlic, try this Cheesy Garlic Pull Apart Bread alongside. Crunchy crust plus smooth, fruity olive oil is simply heaven!
Making the Ultimate Simple Sandwich Bread
If you’re lucky enough to have leftovers (rare around here!), this bread makes a fantastic base for sandwiches. Thanks to its sturdy but tender crumb, your sandwiches won’t fall apart on the first bite. The key? Always slice completely cool bread. Cutting warm bread squishes the crumb and makes it denser, which isn’t ideal in a sandwich.
Once it’s cooled, slice it thick and top it with your favorites. This Italian bread loves hearty flavors like salty prosciutto, creamy fresh mozzarella, sweet roasted red peppers, and peppery arugula. It soaks up moisture way better than your average store loaf, making it your new favorite lunch staple!
Add-Ins and Substitution Ideas
Feel like jazzing up this bread without losing that perfect crust and crumb? Here are some simple swaps and additions you can try, all while keeping things easy and fuss-free.
- Flour swaps: Trade up to 1/2 cup of all-purpose flour for bread flour for an even chewier crust. For a nuttier, heartier crumb, swap up to 1 cup of all-purpose for whole wheat flour—but add 1-2 tablespoons more water to keep the dough balanced.
- Yeast options: Instant or rapid-rise yeast works perfectly here—no need to proof it separately. Just toss it with the dry ingredients and add your warm water. Active dry yeast is great too; just proof it as usual.
- Sweeteners and fats: Try honey or maple syrup instead of sugar (use about 3/4 the amount) and reduce the water by a tablespoon or two. Swap olive oil for melted butter for a richer flavor, or use a neutral oil if you prefer.
- Flavor boosters: Add in 1/2 to 1 cup of grated cheeses like Parmesan, Asiago, or mozzarella; toss in 1/2 to 3/4 cup chopped olives; or fold in 1/2 cup roasted red peppers. Fresh herbs like rosemary, thyme (1–2 tbsp), dried herbs (1–2 tsp), or garlic powder/roasted garlic (1 tsp to 1 tbsp) bring fantastic aroma and depth.
- Toppings: Before baking, brush the loaf with water, an egg wash, or olive oil. Sprinkle on sesame seeds, poppy seeds, fennel seeds, or coarse sea salt for an extra touch of rustic charm and crunch.
- Shape changes: Want loaf shape? Press the dough into a greased loaf pan and bake as usual (watch internal temp for doneness). For rolls, divide the dough into 8-12 balls, let rise, then bake at 400°F for 18-22 minutes until golden and beautiful. For a quick visual on rounding and proofing buns, see these step-by-step bun shaping tips.
- Slow fermentation for flavor: For deeper flavor, refrigerate the dough after the first rise or after shaping for up to 24 hours. Bring it back to room temperature and finish the second rise before baking. This slow ferment adds complexity without extra work.
- What not to do: No-knead methods make wetter doughs with open crumb, but won’t give this loaf’s chewy structure or hold its shape well. Also, gluten-free flours need special recipes and binders and won’t swap in directly here. If you need a gluten-free option, start with a dedicated recipe like Almond Flour Bagels.
Keep the dough hydration close to the original recipe, tweaking water a tablespoon at a time if your dough feels too sticky or dry while experimenting. It’s easy to adjust!
Storing and Reviving Crusty Bread
Know that frustrating moment when your crusty bread loses its crunch just overnight? It happens fast! Once the bread has fully cooled—no cutting corners here!—avoid wrapping it tight in plastic immediately. That traps moisture inside and ruins your crust.
My go-to trick is to wrap the loaf loosely in a clean kitchen towel and keep it on the counter for up to a day—this also works for rustic loaves like gluten-free Irish soda bread. This keeps the crust pleasant and the crumb lovely.
If your bread gets a little stale, don’t toss it. Bring it back to life by lightly misting or sprinkling water on the crust, wrapping it loosely in foil, then warming it in a 350°F oven for 10 minutes. That simple step crisps the crust and refreshes the loaf like new—perfect alongside baked brie with cranberry sauce!
Common Bread-Baking Questions
I know how baking bread can feel intimidating at first, even with an easy recipe like this one. You might have questions or run into a few bumps when going beyond the instructions to really crafting artisan bread at home. Let’s tackle those common queries that I hear over and over from home bakers just like you.
Can I use the No Knead Italian Bread method instead?
Great question! No-knead methods are super convenient for some breads, but for this recipe’s signature chewy bite and sturdy crust, those 8 to 10 minutes of kneading can’t be skipped. Kneading builds a strong gluten network that gives structure and keeps your loaf from spreading out flat. Skip kneading, and your dough stays wetter and less manageable, leading to a looser shape. So, for consistent, bakery-style results here, kneading is definitely a must-do. If you want to practice those same kneading and shaping skills on an enriched loaf, try our Apricot Cream Cheese Babka.
Why didn’t my Italian bread get a hard crust?
I’ve been there! When your crust turns out soft instead of crisp, it almost always comes down to missing or messing up the steam step. This steam step applies to lean, crusty loaves; quick breads like Grandma’s Banana Nut Bread rely on chemical leavening and don’t need steam. Remember when I told you to preheat a shallow pan in the oven and pour hot water in just as the bread goes in? That steam keeps the crust surface moist longer during the early bake, allowing the bread to puff fully before the crust hardens. Skip the steam, and your crust sets early, staying soft and dull rather than crackly and golden like you want.
PrintA simple, beginner-friendly recipe for homemade Italian bread with a crackly golden crust and soft, chewy interior, using everyday pantry ingredients.
- Prep Time: 15 minutes
- Cook Time: 35 minutes
- Total Time: 2 hours 30 minutes
- Yield: 1 loaf (about 1.5 pounds) 1x
- Category: Bread
- Cuisine: Italian
Ingredients
- 3 1/2 cups all-purpose flour
- 1 1/2 teaspoons salt
- 1 teaspoon granulated sugar
- 2 1/4 teaspoons active dry yeast (1 packet)
- 1 1/2 cups warm water (105–115°F)
- 2 tablespoons olive oil, plus extra to coat bowl
Instructions
- Whisk together 3 1/2 cups all-purpose flour, 1 1/2 teaspoons salt, 1 teaspoon sugar, and 2 1/4 teaspoons active dry yeast in a large bowl.
- Warm 1 1/2 cups water to 105–115°F.
- Pour warm water and 2 tablespoons olive oil into dry ingredients and stir with a wooden spoon until a rough, sticky dough forms.
- Lightly flour work surface and knead dough 8–10 minutes until smooth, stretchy, and slightly springy.
- Lightly grease a clean bowl with olive oil, place dough inside, cover snugly with towel or plastic wrap, and let rise in a warm spot 1–1 1/2 hours until doubled.
- Gently press air out of dough, shape into loose oval or round, place on parchment-lined baking sheet.
- Cover shaped loaf loosely and let rise again 30–45 minutes until puffed and airy.
- Preheat oven to 400°F with shallow pan on bottom rack and optional baking stone or cast-iron skillet on upper rack.
- Brush top of loaf lightly with water and score a few shallow slashes across top with sharp knife or razor blade.
- Just before baking, pour about 1 cup hot water into preheated shallow pan to create steam, quickly close oven, and slide loaf in.
- Bake 30–35 minutes until crust is deep golden brown and loaf sounds hollow when tapped.
- Remove bread and cool completely at least 45 minutes before slicing.
Notes
Steam during baking is essential for a crisp crust and proper oven spring., Use a baking stone or cast-iron skillet if available for better oven spring and crust texture., Allow bread to cool completely before slicing to prevent gummy or dense crumb., Bread can be customized with additions like olives, cheese, herbs or shaped as rolls or pan bread., Store bread loosely wrapped in a kitchen towel at room temperature for up to one day to maintain crust., To revive stale bread, mist with water, wrap loosely in foil, and warm in 350°F oven for 10 minutes.
Nutrition
- Serving Size: 1 slice
- Calories: approximately 180 calories per slice
- Fat: 3 grams per slice
- Carbohydrates: 36 grams per slice
- Protein: 6 grams per slice